|

A Short Introduction to the Cyanotype |
| History
of the Cyanotype. |
The
invention of the Cyanotype process is accredited to Sir John Herschel,
the Astronomer Royal, in 1842. It is believed that he developed
this process so as to be able to make accurate copies of his designs,
calculations and notes. Prior to this process draughtsmen were
employed to copy the work. Herschel became dissatisfied with the
mistakes and inaccuracy that often arose and so the ' Blue-print
' came into being.
|
| Though
used mainly for copying drawings it did not take long for the
process to be taken up by photographers after it was found that
it could be used to produce prints from continuous tone negatives,
provided that they exhibited plenty of contrast. The Cyanotype
is a printing out process. It is one of the oldest and most permanent
printing processes still in use by, amongst others, Fine Arts
Photographers. |
| Method
of Cyanotype Production |
Ferric
Ammonium Citrate (green) = 20 grams
Water at 22 degrees centigrade = 100ml. |
Potassium
Ferricyanide = 10 grams
Water at 22 degrees centigrade = 100ml. |
Ferric
Ammonium Citrate (green) = 20 grams
Oxalic Acid (HIGHLY TOXIC) = 5 grams
Water at 22 degrees centigrade = 100ml. |
Potassium
Ferricyanide = 10 grams
Oxalic Acid (HIGHLY TOXIC) = 5 grams
Ammonium Dichromate = 2 grams
Water at 22 degrees centigrade = 100ml. |
Home
made printing frame
| Store
solutions A and B, separately, in brown bottles (available from
chemists and drugstores) in the dark. |
| For
use mix together equal parts of A and B. 10ml of each (20ml in
total) should be enough for 10 5x4 prints. |
Stored
separately solutions A and B will keep indefinitely. Once mixed
the solution will keep for about 24 hours and should be kept out
of U.V-light.
|
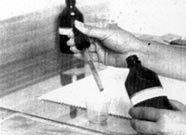
Water
Colour Paper (300g weight) makes an ideal print base and can be
coated in weak artificial light. It is important that you use
a stitched brush, i.e. one whose bristles are not held in place
by metal crimping. The metal can react with the solutions giving
adverse effects. The Japanese calligraphy style of brushes are
ideal.
|
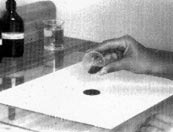
Allow
the coated paper to dry naturally as the solution will 'fog' if
heat is applied. Once the paper is dry (please make sure that
the paper is thoroughly dry, if not you could find your negatives
bleached) the negative can be placed in contact and exposed to
a U.V-Light source. Sunlight is still considered to give the best
results and has the advantage of being free.
|
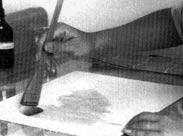
| After
exposure the print is 'developed' in running water. This will
develop and fix the photograph. It is recommended that the water
used in the final wash be slightly acidified with a few drops
of hydrochloric acid. The print is then hung, in the dark, to
dry naturally. Once dry the print will have oxidized resulting
in the familiar brilliant cyan colour. |
| It
is possible to speed up this oxidization process by bathing the
print, after the final wash, in a weak solution of Hydrogen Peroxide. |
Cyanotypes
can be toned to produce several different colours. Unfortunately
the process of doing so can be a very hit or miss affair. Do not
let this put you off as, with a little patience, experimentation
and luck, the results can be well worth the time and trouble involved.
|
| N.B.: |
If
your are going to tone prints that you have previously produced
and dried, before toning, soak the prints, briefly, in distilled
water at room temperature. |
| Green: |
Make
a saturated, 20ml, solution of Ferric Protosulphate.
Add to this 4 drops of Sulphuric Acid and then dilute with an
equal amount of water (20ml).
You should now have 40ml of toner into which the print can be
immersed.
Once the desired tone has been achieved remove the print and wash
in water.
|
| Lilac-violet: |
Place
the print in a solution of borax and water.
Wash after the desired tone has been achieved.
|
| Mauve,
Grey and Red: |
This
solution will produce all three tones. It's just a question of
how long you leave the print in the solution.
There are no hard and fast rules to the length of time as there
are too many variables. Therefore this has to be done by inspection
and it does not always work, but when it does the results can
be beautiful.
Print darker than usual and then wash for 10 minutes, then immerse
in a solution of Copper Nitrate (into which a few drops of ammonia
have been added - add drop at a time until the precipitate has
redissolved.
This bath turns the print first mauve, then grey and then finally
red. |
July 2024 Several books, featuring Christopher John Ball's photographs, are now available through Amazon or click on an image below to purchase via secure payments on lulu.com
Return
to Formulae Contents
|